
So, you’ve built something solid with React, but now you’re running into limitations. Maybe you’re struggling with SEO, looking for better performance, or tired of setting up complex tooling from scratch.
That’s where Next.js comes in.
Next.js builds on top of React and adds powerful features like server-side rendering, static site generation, built-in routing, and API support. It’s designed to scale with your needs while simplifying things under the hood.
If you’re wondering how to move your existing React project over to Next.js without breaking everything, this guide is for you. We’ll walk through the migration step-by-step, showing you how to transition smoothly and take advantage of everything Next.js has to offer.
Why Migrate to Next.js?
Migrating from a traditional React setup to Next.js is more than just a technical decision; it’s a way to unlock better performance, visibility, and long-term maintainability.
If you’re investing in a digital product that needs to perform well, scale efficiently, and deliver an excellent user experience, Next.js offers real advantages that align with those business goals.
| Category | React (Create React App) | Next.js | Business Impact |
| Performance | Client-side rendering only; slower initial load | Server-side & static rendering; faster load times | Improves user experience and engagement |
| SEO | Limited SEO due to content loading after page render | Strong SEO with server-rendered pages | Higher discoverability and organic traffic |
| Routing | Manual setup using React Router | File-based routing built-in | Faster development and fewer routing bugs |
| Scalability | Requires custom architecture as the app grows | Built-in structure for large apps | Easier to maintain and scale over time |
| Backend/API Support | Needs a separate backend or API layer | API routes built into the framework | Faster launches and simpler infrastructure |
| Image Optimization | Handled manually or via external libraries | Built-in responsive image handling | Better performance on mobile, reduced bandwidth |
| Mobile Experience | Dependent on the developer setup | Optimized for mobile by default | Increased retention, especially on mobile-first audiences |
| Time to Market | More setup time and boilerplate | Production-ready defaults | Accelerates development and releases |
| Future-Readiness | Requires ongoing customization to adopt new standards | Actively maintained with modern features | Long-term viability and innovation-friendly |
Here’s what makes it worth the move:
Faster Load Times = Better User Experience
Next.js allows pages to be loaded faster by rendering content on the server or ahead of time before users request it. Unlike traditional React apps, which rely on the browser to build each page after loading, Next.js sends fully prepared content to users right away.
Why it matters:
- Visitors stay longer and engage more when the site feels fast.
- Reduced bounce rates and increased conversions, especially on mobile.
- Performance directly impacts customer satisfaction and retention.
Stronger SEO for Organic Growth
React apps built with Create React App often face challenges with search engine optimization because content is generated after the page loads. Next.js solves this by making pages crawlable from the start, improving how search engines read and rank your site.
Why it matters:
- Higher visibility on Google and other search platforms.
- Better discoverability of key pages like product listings, services, or landing pages.
- Increased inbound traffic without relying solely on paid marketing.
Built to Scale as Your Business Grows
Next.js introduces structure, conventions, and built-in features that reduce complexity as your application evolves. From routing to code management, it helps development teams work more efficiently and keep things organized.
Why it matters:
- Faster development cycles and fewer bugs as the app scales.
- Easier to onboard new developers or expand teams.
- Supports long-term innovation without needing to re-architect everything.
All-in-One Framework: Frontend + Lightweight Backend
Next.js allows you to build both the user interface and lightweight backend logic (such as APIs) within the same project. This is ideal for businesses that want to launch faster without spinning up separate services.
Why it matters:
- Reduces time to market by streamlining development.
- Cuts down on infrastructure complexity and maintenance.
- Supports rapid prototyping and testing of new ideas.
Optimized for Media and Mobile Experiences
With built-in tools for image optimization and responsiveness, Next.js helps ensure that visual content looks great and loads efficiently across all devices.
Why it matters:
- Improves mobile performance, where many users now engage first.
- Enhances visual storytelling and brand presentation.
- Supports modern web standards and future-proof practices.
Also Read: Activity Tracking App Development Using Next.js: GPSViewer’s Transformative Approach
Ready for the Future of the Web
Next.js is actively maintained by Vercel and used by leading tech companies worldwide. It’s built with long-term success in mind, offering ongoing updates, modern features, and compatibility with emerging trends like edge computing, AI integrations, and cloud scalability.
Why it matters:
- Your app stays competitive without major rework.
- Positions your tech stack to support future innovations.
- Provides peace of mind with enterprise-grade reliability.
Pre-Migration Checklist: What to Do Before Moving from React to Next.js

Skipping or rushing the pre-migration preparation can lead to costly delays, broken features, and poor user experience, directly impacting customer trust and revenue streams.
On the other hand, investing time in preparation reduces risks, accelerates migration, and ensures your business benefits fully from Next.js’s powerful capabilities.
This detailed pre-migration checklist helps your team get ready, mitigate risks, and ensure a smooth, efficient migration process that preserves your customer experience and business continuity.
With a solid pre-migration foundation, your team can confidently move forward, transforming your React app into a faster, more scalable, and SEO-friendly Next.js application that meets today’s digital demands.
1. Assess Your Current Application Setup
- Understand the current framework: Confirm that your application is built with Create React App (CRA) or a similar setup. This forms the baseline for migration.
- Identify custom configurations: Review if your app uses advanced CRA features such as custom homepage URLs, service workers for offline use, or specific build tool adjustments (like Babel or Webpack tweaks). These require special handling in Next.js and may involve additional effort.
- Evaluate complexity: Take stock of the app’s size, number of routes, dependencies, and integrations to anticipate the scale of migration work.
2. Secure a Complete Backup of Your Application
- Version control: Make sure all your current source code is committed and safely stored in a version control system like Git. This enables rollback if needed and facilitates collaboration.
- Backup configuration and assets: Save copies of important files such as environment configurations, build scripts, and static assets (images, icons, metadata files). This helps ensure nothing is lost during migration.
3. Catalog Dependencies, Libraries, and Assets
- List external libraries: Document all third-party tools, UI libraries, and CSS frameworks currently in use (e.g., Tailwind CSS). Some of these may require specific integration steps with Next.js.
- Identify static files: Locate all images, favicon files, robots.txt, and other metadata assets. Next.js handles these differently, so knowing what you have helps plan how to migrate them.
- Consider testing and iconography: If your app has testing setups or custom icons managed through CRA, prepare for how these will be replicated or adjusted in Next.js.
4. Prepare Environment Variables
- Inventory all variables: List all environment variables used in your current app, including API keys, endpoints, and feature flags.
- Plan for renaming: Next.js requires client-exposed environment variables to have a special prefix (NEXT_PUBLIC_). Identify which variables need to be renamed to maintain functionality and security.
- Review sensitive data: Ensure that sensitive variables meant only for server use remain private and are not accidentally exposed to the browser.
5. Define Migration Strategy for Incremental Adoption
- Start with Single-Page Application (SPA) mode: Plan to initially run your app on Next.js as a client-side SPA to reduce migration risk and maintain user experience continuity.
- Gradually enable Next.js features: Outline a roadmap to adopt Next.js’s server-side rendering, API routes, and other advanced features once the basic migration is stable.
- Testing and validation: Prepare thorough testing plans to verify functionality at each stage of migration, minimizing downtime or user disruption.
6. Review Build and Deployment Process
- Update build scripts: Ensure your deployment pipelines can support the new Next.js commands and folder structures.
- Configure hosting environment: Check compatibility of your hosting or cloud provider with Next.js requirements, including static export or server-side capabilities if you plan to use them later.
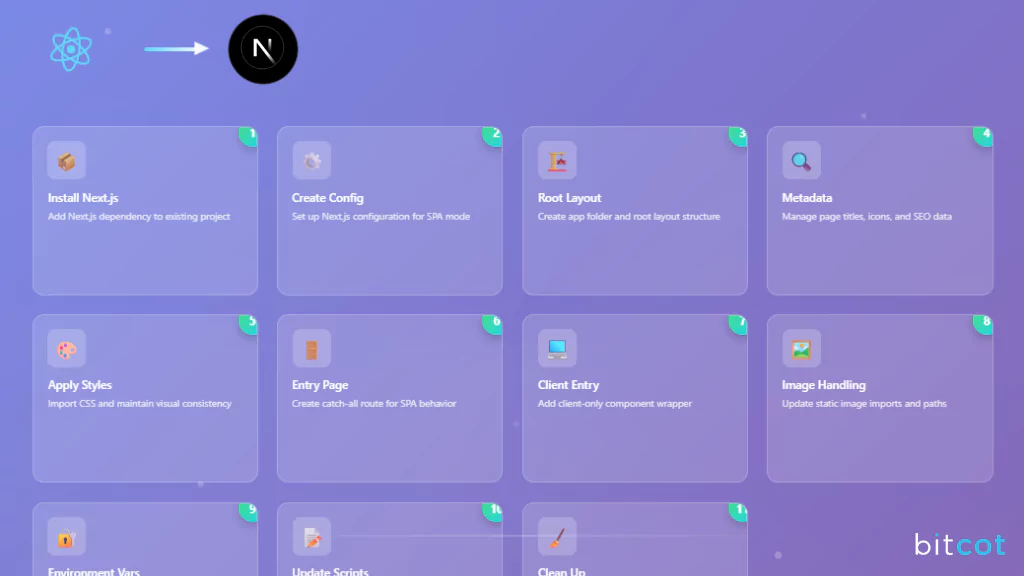
How to Migrate from Create React App to Next.js
Transitioning your existing web application to Next.js involves a carefully planned series of steps that prioritize speed, stability, and minimal disruption.
The objective is to have a working Next.js version of your app up and running as soon as possible, initially keeping it functionally identical by running entirely in the browser (as a single-page application). This approach avoids unnecessary complexity and minimizes risks such as conflicts or downtime.
Once the app is stable on Next.js, it opens the door to adopting more advanced capabilities at a comfortable pace, enhancing performance and future scalability.
Below, we lay out each migration step in detail, providing a comprehensive, easy-to-understand roadmap for this important upgrade.
Step 1: Install Next.js Dependency
The very first and most important step in moving your web application to Next.js is to install the Next.js dependency into your existing project. This means adding Next.js’s core tools and framework so the application can begin running on this new platform.
Think of this like equipping your current app with a new engine that will power it more efficiently in the future. At this stage, nothing changes in how your app looks or behaves; your users will still experience the same interface and functionality because the app continues to run fully inside their web browsers (as a single-page application).
Installing the Next.js dependency lays the foundation for all the upcoming changes. It prepares your app to take advantage of Next.js’s benefits, such as better performance and scalability, while ensuring a smooth transition without any disruption to your users or your team.
Step 2: Create the Next.js Configuration File
After installing Next.js, the next essential step is to create the Next.js configuration file. This file acts like a set of instructions that tells Next.js exactly how to build and run your application.
In this configuration:
- The app is set to work as a Single-Page Application (SPA), meaning it continues to run entirely in the browser without relying on server-side features for now. This keeps the migration simple and reduces risk.
- The build output (the files Next.js generates when preparing your app) is directed to a specific folder named “build”. This keeps all new files organized and separate from existing ones.
By creating this configuration file, the project is aligned with Next.js’s expectations and is prepared to run smoothly in its initial migration phase. Later, this setup can be adjusted to unlock more advanced Next.js features if desired.
Step 3: Create the Root Layout
The next important step is to create the root layout for your Next.js application. This layout acts as the main structure or framework that wraps around all the pages of your app.
In your existing app built with Create React App, this role is served by a single main HTML file that contains the basic parts of your website, like the header, footer, and main content area. In Next.js, this is replaced by the root layout file.
To do this:
- A new folder called app is created in your project, which will contain the root layout file.
- The content from your old main HTML file is transferred into this root layout, adapting it to the new Next.js system.
- Inside the layout, a special placeholder is added where all the app’s content will be displayed dynamically.
This step is crucial because it sets up the foundational page structure within Next.js. It ensures your app keeps its look and feel while shifting to a new way of managing page layouts.
Additionally, it’s important to note that Next.js manages some files and settings differently than your old app, such as ignoring some default files related to icons and testing unless specifically configured otherwise.
Step 4: Manage Metadata in Next.js
The next key step is to manage metadata for your application within Next.js. Metadata refers to important information about your web pages, such as page titles, descriptions, and icons, that help browsers and search engines understand and display your site correctly.
In your existing app, this information was manually added inside your main HTML file. Next.js simplifies this by automatically including some essential tags, like character encoding and mobile-friendly settings. This means you can remove these tags from your layout file to avoid duplication.
Additionally:
- Files like your favicon (the small icon shown in browser tabs), app icons, and files like robots.txt can be placed directly in a special folder in your project, and Next.js will automatically add them to your pages.
- This eliminates the need to manually reference these files in your layout, making management easier and cleaner.
- Next.js also offers a “Metadata API,” a modern and standardized way to declare important page information (like titles and descriptions) in your code. Using this helps improve how your site appears in search results and when shared on social media.
By handling metadata this way, your site becomes easier to manage, more search-engine friendly, and ready for better web sharing, all without extra manual effort.
Step 5: Apply Styles to Your App
After setting up the structure and metadata, the next step is to ensure your app’s visual appearance remains consistent by applying styles within Next.js.
Your existing app uses CSS files to control colors, fonts, layouts, and overall design. Next.js supports these styling methods right out of the box, so your current styles can be reused with minimal changes.
Key points to note:
- Global CSS files, which apply styles across the entire app, can be imported directly into the main layout file you created earlier. This ensures your look and feel remain consistent across all pages.
- Next.js also supports modular CSS, allowing styles to be scoped to specific components if needed, which helps keep styles organized and prevents conflicts.
- If your project uses specialized styling frameworks like Tailwind CSS, Next.js provides clear instructions for integrating these smoothly.
By correctly importing and managing your CSS styles, the app’s appearance remains seamless throughout the migration, preserving your brand’s visual identity without disruption.
Step 6: Create the Entrypoint Page
The next crucial step is to create the entrypoint page in Next.js. This is the starting page or main route where your application loads and begins operating.
In your existing setup with Create React App, the app starts from a single entry file that loads all the content. However, Next.js organizes the app routes differently: it uses folders and files to define what the user sees for each web address.
To keep your app running as a single-page application (SPA), meaning users can navigate without full page reloads, a special “catch-all” folder is created. This folder captures all possible URLs and points them to the same page. This ensures that every part of your app’s current navigation works exactly as before, with no broken links or changes in behavior.
This step is important because it preserves the seamless user experience your customers expect, while setting the foundation for future enhancements with Next.js routing capabilities.
Also Read: Next.js vs React: What’s the Difference and Which Should You Choose
Step 7: Add a Client-Only Entrypoint
The next step is to add a client-only entrypoint to your Next.js app. This means embedding your current application’s main component inside a part of Next.js that runs entirely in the user’s browser, preserving how the app behaves today.
In technical terms, Next.js allows components to run either on the server or in the browser. To keep the app functioning exactly as it does now, as a single-page application that handles all interactions in the browser, you need to specifically designate this part to run only on the client side.
This setup:
- Keeps all your existing app logic and user interactions intact.
- Avoids unnecessary server processing at this stage, which simplifies the migration.
- Provides the flexibility to gradually adopt Next.js’s advanced server-side features later on, when ready.
By clearly marking this “client-only” section, the app continues to work smoothly for your users, while benefiting from the Next.js framework underneath.
Step 8: Update Static Image Handling
The next important step is to update how static images are handled in your application after moving to Next.js. Images such as logos, icons, and photos are an essential part of your app’s look and feel, so managing them correctly is vital.
In your current setup, images are typically imported as simple file links. Next.js changes this approach slightly by providing special support to optimize images automatically. This means images can load faster and display better on different devices, improving the overall user experience.
Key points about this step include:
- The way images are imported changes, which might require adjusting file paths to keep everything organized.
- You can keep using your existing image tags to avoid major changes initially, then later take advantage of Next.js’s advanced image optimization features when ready.
- Next.js’s built-in image component automatically handles image sizes and optimizes loading, which reduces delays and visual glitches as pages load.
- Special care is taken to prevent images from appearing distorted, ensuring your brand visuals stay crisp and professional.
By updating image handling thoughtfully, your app maintains a polished appearance while benefiting from Next.js’s modern performance enhancements.
Step 9: Migrate Environment Variables
The next step is to migrate environment variables for your application when moving to Next.js. Environment variables are settings that help manage things like API keys, server addresses, or feature toggles without hardcoding them into your app’s code.
In your current setup, these variables might have specific naming conventions that need to be updated for Next.js to recognize and use them properly. This mainly involves changing the prefix of these variables so that those needed on the client side (in the browser) are correctly exposed.
Key points for this step include:
- Adjusting the names of environment variables from the previous format to the new one required by Next.js.
- Ensuring sensitive information remains secure and only variables meant for the browser are exposed.
- This step helps maintain the seamless functioning of your app’s integrations and configurations after migration.
By carefully updating environment variables, the app’s connection to external services and configurations continues without interruption, supporting a smooth user experience.
Step 10: Update Scripts in Package Configuration
The next important step is to update the scripts in your project’s package configuration to work with Next.js. These scripts are simple commands that help start, build, and run your application during development and production.
In your current setup, scripts are tailored for the existing framework, so they need to be changed to use Next.js commands instead. This ensures that your app builds correctly and can be run smoothly both during development and once it’s live.
Key points include:
- Replacing old commands with new ones that instruct Next.js how to develop, build, and serve the app.
- Adding certain files and folders to the project’s ignore list to keep unnecessary files out of version control, which helps maintain a clean and organized codebase.
- After updating, the app can be launched locally to verify it’s running on Next.js in the initial single-page app mode.
This step prepares the app to use Next.js’s powerful tools and workflows effectively, ensuring a smooth transition for your development team and stakeholders.
Step 11: Clean Up Legacy Files
The final step in the migration process is to clean up legacy files that were specific to your previous setup with Create React App (CRA). These files are no longer needed because Next.js manages the application differently.
Removing these outdated files helps simplify the project, reduce clutter, and avoid confusion for your development team moving forward.
Key points of this cleanup include:
- Deleting the old main HTML file that was used to load your app in CRA.
- Removing the original app entry file that started your application.
- Getting rid of configuration files and scripts that were unique to CRA.
- Uninstalling unnecessary dependencies related to CRA, which are no longer required with Next.js.
This cleanup ensures your project is lean, focused, and fully aligned with Next.js standards, making future development and maintenance easier and more efficient.
Post-Migration Checklist: Ensuring a Smooth Transition After Migration
Completing the migration to Next.js is a major milestone, but the process doesn’t end there. A careful review and validation phase helps confirm that everything works as expected and sets the stage for ongoing success.
Key post-migration steps include:
- Verify functionality: Test all key features and user flows to ensure the app behaves as before, with no unexpected issues.
- Performance monitoring: Check loading speeds, responsiveness, and any new optimizations introduced by Next.js.
- SEO and metadata validation: Confirm that page titles, descriptions, and other metadata are correctly displayed to maintain search engine rankings and improve visibility.
- Update documentation: Reflect the new architecture and processes in your internal documentation for development and maintenance teams.
- Plan gradual rollout of Next.js features: Once the app is stable, progressively enable server-side features and advanced capabilities offered by Next.js.
- Communicate with stakeholders: Keep business owners, product teams, and customers informed about the migration completion and any upcoming improvements.
By following these post-migration checks, businesses can minimize risks, ensure continuity, and fully leverage the benefits of Next.js.
Why Partner with Bitcot to Migrate Your React Project to Next.js
Migrating your application to Next.js can unlock significant performance, scalability, and SEO benefits.
However, the process requires careful planning and technical expertise to ensure a smooth transition without disrupting your users.
Bitcot brings the right combination of experience, strategy, and communication to help businesses successfully migrate and thrive with Next.js.
Proven Expertise in Next.js Migration
Bitcot’s team has deep knowledge of both your current platform, like Create React App, and the Next.js framework. This dual expertise ensures your migration preserves existing functionality while setting up the app for future growth.
Customized Migration Strategy
Every migration plan is customized to your unique business requirements, current technology stack, and future goals. This personalized approach ensures that the migration process aligns perfectly with your operational needs and minimizes disruption to your users.
Strong Focus on Delivering Business Value
Beyond the technical work, Bitcot prioritizes outcomes. The migration strategy emphasizes faster performance, improved SEO, enhanced user experience, and scalability. Bitcot ensures the technical transformation supports measurable improvements in customer engagement and revenue.
Also Read: NestJS vs Next.js: Which Framework is Right for Your Project?
Transparent Communication and Collaboration
Clear and regular communication keeps all stakeholders informed and involved in the migration process. Bitcot provides timely updates, welcomes feedback, and ensures the project stays aligned with business priorities. Collaborative planning helps avoid surprises and keeps the migration on track.
Ongoing Support and Future-Ready Solutions
Migration is just the beginning. Bitcot offers continuous support and strategic guidance to help you adopt new Next.js features as your needs evolve. This ongoing partnership helps your application remain cutting-edge and competitive, supporting long-term success.
Final Thoughts
Migrating your application to Next.js is a strategic investment that can significantly enhance your website’s performance, scalability, and user experience. While the technical steps may seem complex, approaching the migration methodically and partnering with an experienced team ensures a smooth transition with minimal disruption.
Bitcot’s expertise in web app development services and business-focused approach provide the guidance and support needed to navigate this journey confidently. By embracing an incremental migration strategy, thorough testing, and clear communication, organizations can unlock the full potential of Next.js while safeguarding their existing operations.
Ultimately, successful migration is not just about technology; it’s about empowering your business to innovate faster, deliver superior digital experiences, and stay competitive in an evolving market. With the right partner, the move to Next.js becomes a catalyst for growth and lasting success.
Get in touch with our team.