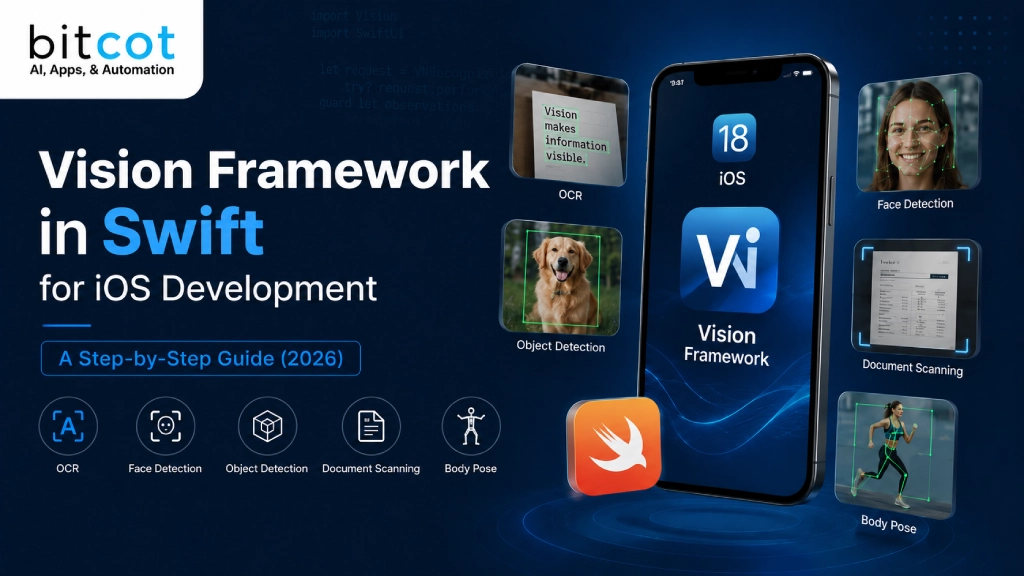
- The Vision framework adds computer vision to any iOS app on-device, so it runs offline, keeps photos private, and costs nothing per scan.
- Two APIs exist: the classic VN-prefixed classes for older iOS, and a cleaner Swift-only API with async/await for iOS 18 and 26.
- It handles OCR, face detection, barcode scanning, body and hand pose, and document scanning via VisionKit, each in a few lines of Swift.
- For custom object detection, wrap a Core ML model in VNCoreMLRequest: there is no VNRecognizeObjectsRequest class despite the common search.
- Vision is the analysis engine, VisionKit adds scanning UI, and visionOS is a separate OS for Apple Vision Pro.
iOS development never stands still, and 2026 is proof. Every release raises the bar for what users expect from a mobile app, and staying current with Apple’s tooling is how teams across the United States keep their products competitive rather than dated.
One toolset keeps earning its place in that conversation: the Vision framework – Apple’s engine for on-device machine learning applied to images and video. It lets you read text, detect faces, scan barcodes, and recognize objects right on the device, without shipping a user’s photos to a server.
Whether you are building a photography app, a document scanner, an accessibility reader, or an augmented reality feature, the Vision framework is often the fastest path from idea to working prototype.
In this guide, we’ll walk through the Vision framework in Swift for iOS app development step by step, with real, copy-ready code for OCR, face detection, object detection, document scanning, and body pose – plus a set of project ideas and a quick API reference. It is written for the US teams putting computer vision into their iOS products: the engineer evaluating the framework, and the founder or CTO deciding how to ship it.
What Is the Vision Framework?
What is the Vision framework? It’s Apple’s high-level, on-device machine learning API for running computer vision and image analysis inside an iOS app, with no ML background required. Before we write any code, it helps to understand what that means in practice.
It gives you a consistent way to process still images and live video, detect and track objects, recognize text, and perform face and landmark detection. It works across the Apple lineup – iPhone, iPad, Mac, and Apple Vision Pro – and pairs naturally with SwiftUI for the UI layer.
As of 2026, the framework runs on the Neural Engine built into recent Apple Silicon – the A17 Pro and newer A-series chips, and the M-series chips in iPad and Mac – so sophisticated vision tasks execute locally and in real time. That means lower latency, no server round-trip, and no cloud bill that grows with every user.
At WWDC 2024, Apple introduced a new Swift-only Vision API built around async/await and Swift Concurrency, and at WWDC 2025, it added structured document reading, camera-lens smudge detection, and an updated hand-pose model. The current reference lives in the Apple Vision framework documentation.
Because the heavy lifting happens on-device, sensitive visual data does not have to leave the phone. That is good for performance and a genuine trust signal for users, and it simplifies compliance for products handling personal information.
Vision Framework vs. visionOS: Don’t Confuse Them
Are the Vision framework and visionOS the same thing? No, and the mix-up is common enough that it is worth settling up front. The Vision framework is Apple’s on-device image-analysis API – the subject of this guide, and it has existed since iOS 11. visionOS is the separate operating system that powers Apple Vision Pro, the spatial computing headset. You write an import Vision to analyze images on iPhone, iPad, or Mac; you build for visionOS when you are creating a spatial app for the headset. They share a word and nothing else.
Key Features of the Vision Framework
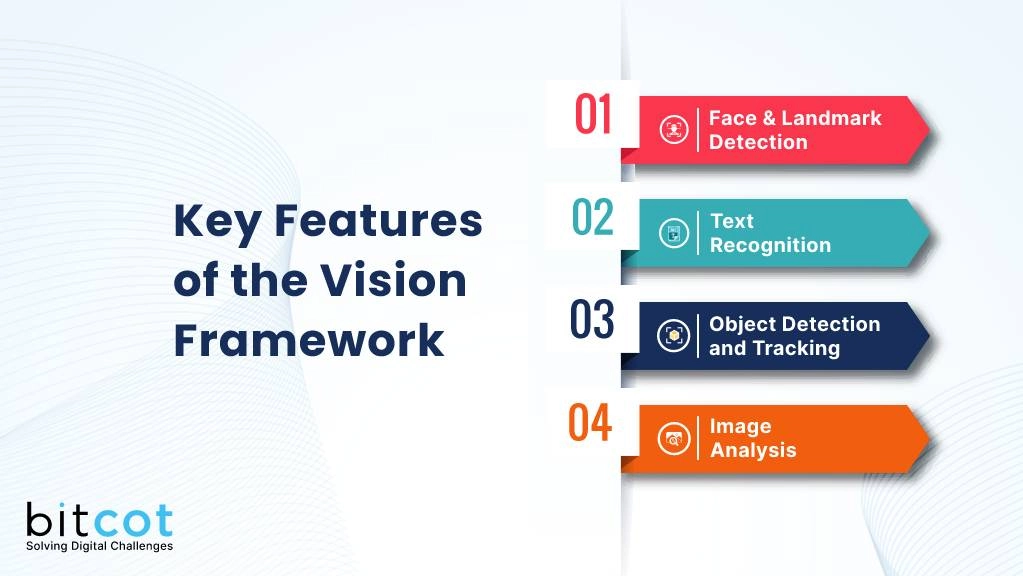
What can the Vision framework actually do? Quite a lot. It covers a wide surface area, and these are the four capabilities most teams start with:
- Face and landmark detection: Locate faces and facial landmarks in images or a live video stream. This powers face-aware camera framing and filters that track expressions and movement.
- Text recognition (OCR): Read and extract text from images and video frames – optical character recognition running entirely on-device. Ideal for document scanning, translation, and accessibility.
- Object detection and tracking: Identify and follow objects in real time, the backbone of augmented reality, product scanners, and visual search.
- Image analysis: Pull information out of an image – dominant colors, scene classification, saliency, feature prints, and an aesthetics score – to drive smarter suggestions and automatic organization.
Those four are only the starting point. The framework ships more than two dozen on-device operations, and several are worth knowing about – including recent additions from the 2025 and 2026 releases:
- Barcode and QR code detection for checkout, ticketing, and inventory scanning.
- Body and hand pose estimation for fitness, gesture, and sign-language apps.
- Structured document reading (2025) that groups text into paragraphs, tables, and lists.
- Camera lens smudge detection (2025) that flags blurry or smudged shots before you process them.
- Tap-to-segment (2026) that isolates any object in an image from a single tap and returns a pixel mask.
- Image feature prints for visual similarity, plus trajectory and animal detection for sports and wildlife apps.
Vision also expanded to watchOS in 2026, so the same recognition code now reaches Apple Watch apps. All of it runs on-device, with no custom model training required.
Vision Framework API Quick Reference
Which request do you actually need? Most Vision work comes down to that single choice. This reference maps each common request to what it does and links to Apple’s official documentation. Request names use the classic VN-prefixed API; the newer Swift-only API drops the VN prefix (for example, RecognizeTextRequest).
| Vision request | What it does | Apple docs |
|---|---|---|
| VNRecognizeTextRequest | Finds and recognizes text (OCR) in an image. | View docs |
| VNDetectFaceLandmarksRequest | Detects faces and facial landmarks such as eyes and mouth. | View docs |
| VNCoreMLRequest | Runs a custom Core ML model for classification or object detection. | View docs |
| VNDetectBarcodesRequest | Detects and decodes barcodes and QR codes. | View docs |
| VNDetectHumanBodyPoseRequest | Detects body joints for pose and gesture estimation. | View docs |
| VNGenerateImageFeaturePrintRequest | Generates a feature print for image similarity and search. | View docs |
Getting Started with the Vision Framework
How do you start using the Vision framework? You import it, create a request, hand it an image, and read the results. There are two ways to make those calls today. The classic API – the VN-prefixed classes – has been around for years, still works, and matches most tutorials you will find. The newer Swift-only API, available from iOS 18 onward and current in iOS 26, is cleaner, uses async/await, and is the one Apple now recommends for new work.
We’ll show the classic flow first because it makes the mental model obvious, then the modern equivalent. Either way, the pattern is the same: import the framework, create a request, hand it an image, and read the results.
Import the Vision framework
Add the import at the top of your Swift file so the request and handler types are available.
import Vision
Create a request
A request is the question you are asking of an image, such as “where is the text?” The closure runs when the analysis finishes.
// Request

let request = VNRecognizeTextRequest { request, error in

// Do something with request.results

}
Create a request handler
The handler is a container for the image you want to analyze. Pass it a CGImage, CIImage, or pixel buffer from the camera.
// Handler

let handler = VNImageRequestHandler(cgImage: cgImage)
Handle the results
Inside the completion closure, cast the results to the observation type you expect and use them. For text, you get an array of VNRecognizedTextObservation.
 class="language-">
guard let observations =

request.results as? [VNRecognizedTextObservation] else { return }

let text = observations.compactMap {

$0.topCandidates(1).first?.string

}.joined(separator: "\n")
Perform the request
Finally, ask the handler to run the request. Wrap it in a do/catch so a failure does not crash the app.
// Process request

do {

try handler.perform([request])

} catch {

print(error)

}
The modern Swift-only API (iOS 18+)
From iOS 18 onward, the same job takes fewer moving parts. Requests are value types you configure with properties, and you call perform(on:) with async/await instead of a completion handler – which drops cleanly into a SwiftUI .task modifier. Apple walks through this in the WWDC 2024 Vision session.
import Vision

func recognizeText(in image: Data) async throws -> [String] {

var request = RecognizeTextRequest()

request.recognitionLevel = .accurate

request.automaticallyDetectsLanguage = true

let observations = try await request.perform(on: image)

return observations.map { $0.topCandidates(1).first?.string ?? "" }

}
Notice there is no separate handler and no completion closure. New projects on iOS 18 or later should default to this API; apps that still support older versions can keep the classic API or branch on availability. Here is how the two compare.
| Aspect | Classic API (VN…) | Swift-only API (iOS 18+) |
|---|---|---|
| Request type | Class with completion closure | Value type with properties |
| Execution | handler.perform([request]) | await request.perform(on:) |
| Concurrency | Manual (GCD, closures) | Native async/await, Swift 6 |
| Handler needed | Yes, for every call | Optional for single requests |
| Best for | Legacy iOS support | New iOS 18-26 development |
OCR in iOS: Extracting Text with VNRecognizeTextRequest
How do you extract text from an image in iOS? You use the Vision framework’s text recognition, better known as OCR, which reads strings straight off an image on-device. It is the most requested capability we see, so let’s build it end-to-end.
Import the framework
import Vision
Create the OCR request
Create a VNRecognizeTextRequest. It returns an array of VNRecognizedTextObservation, and each observation exposes its most likely text through topCandidates. Set the recognition level to .accurate for quality or .fast for speed.
// Request

let request = VNRecognizeTextRequest { request, error in

guard let observations =

request.results as? [VNRecognizedTextObservation],

error == nil else { return }

let text = observations.compactMap {

$0.topCandidates(1).first?.string

}.joined()

DispatchQueue.main.async {

self.label.text = text

}

}

request.recognitionLevel = .accurate

request.usesLanguageCorrection = true
Handle the results
The closure above already handles the results: it guards against errors, maps each observation to its top candidate, and updates the UI on the main thread. Always hop back to the main thread before touching UIKit or SwiftUI.
Perform the request
Pass an image or camera buffer to the handler and perform the request.
let handler = VNImageRequestHandler(cgImage: cgImage)

do {

try handler.perform([request])

} catch {

print(error)

}
For OCR on structured documents – forms, receipts, tables – reach for RecognizeDocumentsRequest (iOS 18+), which groups text into paragraphs, lists, and table rows automatically. Apple covers it in the WWDC 2025 document reading session.
Face Detection Using the Vision Framework
How do you detect faces on a live camera feed? You feed each camera frame into a face request and draw a box around whatever it finds. It takes a little more setup than a single image because we are processing a video stream, so we will move in stages.
Import the framework
import Vision
Declare the properties you need
You need a capture session, a video output, a preview layer to show the feed, and an array to hold the boxes you will draw around detected faces.
private var videoDataOutput = AVCaptureVideoDataOutput()

private var captureSession = AVCaptureSession()

private lazy var previewLayer =

AVCaptureVideoPreviewLayer(session: captureSession)

private var drawings: [CAShapeLayer] = []
Show the camera feed and capture frames
Display the live preview, then configure the video output so you receive each frame as a buffer you can pass to Vision.
private func showCameraFeed() {

previewLayer.videoGravity = .resizeAspectFill

view.layer.addSublayer(previewLayer)

previewLayer.frame = view.frame

}

// Gets each camera frame to process it later

private func getCameraFrames() {

videoDataOutput.videoSettings =

[(kCVPixelBufferPixelFormatTypeKey as NSString):

NSNumber(value: kCVPixelFormatType_32BGRA)] as [String: Any]

videoDataOutput.alwaysDiscardsLateVideoFrames = true

videoDataOutput.setSampleBufferDelegate(

self, queue: DispatchQueue(label: "cameraFrameProcessingQueue"))

captureSession.addOutput(videoDataOutput)

guard let connection = videoDataOutput.connection(with: .video),

connection.isVideoOrientationSupported else { return }

connection.videoOrientation = .portrait

}
Create the face detection request
Create a VNDetectFaceLandmarksRequest, which returns an array of VNFaceObservation. If there is at least one observation, you have detected a face; otherwise, clear the screen.
let faceDetectionRequest =

VNDetectFaceLandmarksRequest { request, error in

DispatchQueue.main.async {

if let results = request.results as? [VNFaceObservation],

results.count > 0 {

print("Detected \(results.count) faces")

self.handleFaceDetectionResults(observedFaces: results)

} else {

print("No face detected")

self.clearDrawing()

}

}

}
Draw a box around each detected face
Vision returns coordinates normalized between 0 and 1 with the origin at the bottom-left, so convert each bounding box into screen coordinates with the preview layer, then add a CAShapeLayer for each face.
let faceBoxes: [CAShapeLayer] = observedFaces.map { face in

let boxOnScreen = previewLayer.layerRectConverted(

fromMetadataOutputRect: face.boundingBox)

let path = CGPath(rect: boxOnScreen, transform: nil)

let boxShape = CAShapeLayer()

boxShape.path = path

boxShape.fillColor = UIColor.clear.cgColor

boxShape.strokeColor = UIColor.green.cgColor

return boxShape

}

faceBoxes.forEach { view.layer.addSublayer($0) }

drawings = faceBoxes
Face Detection vs. Face Recognition: What’s the Difference?
What’s the difference between face detection and face recognition? They sound alike but solve different problems. Face detection answers “is there a face here, and where is it?” – exactly what VNDetectFaceLandmarksRequest does, and it is built into the framework. Face recognition answers “whose face is this?” – matching a face to a specific identity. Vision does not identify people out of the box; for that, you would train or integrate a Core ML model, run it through VNCoreMLRequest, and take on the significant privacy and consent responsibilities that come with identifying individuals.
Object Detection with a Core ML Model
How do you detect objects with the Vision framework? You wrap a trained Core ML model in a VNCoreMLRequest, which returns VNRecognizedObjectObservation results with labels and bounding boxes. One thing to clear up first: developers often search for a “VNRecognizeObjectsRequest,” but there is no such class in the framework.
For general scene and content classification, no custom model is needed. Ask for the built-in classifier and read the top labels with their confidence scores.
let request = VNClassifyImageRequest { request, error in

guard let results =

request.results as? [VNClassificationObservation] else { return }

let topLabels = results

.filter { $0.confidence > 0.3 }

.prefix(5)

.map { "\($0.identifier): \($0.confidence)" }

print(topLabels)

}
To detect and locate specific objects, wrap your Core ML model (trained in Create ML or downloaded) in a VNCoreMLRequest. Vision handles preprocessing, runs the model on the Neural Engine, and returns bounding boxes you can draw exactly as we did for faces.
let model = try VNCoreMLModel(for: MyObjectDetector().model)

let request = VNCoreMLRequest(model: model) { request, error in

guard let results =

request.results as? [VNRecognizedObjectObservation] else { return }

for object in results {

let label = object.labels.first?.identifier ?? "unknown"

let box = object.boundingBox // normalized 0...1

print("\(label) at \(box)")

}

}
On iOS 18 and later, the modern equivalents are ClassifyImageRequest and CoreMLRequest, used with the same async/await pattern shown earlier, and they pair well with SwiftUI and ARKit for live, on-screen labeling.
Body Pose and Hand Gesture Recognition (VNDetectHumanBodyPoseRequest)
Can the Vision framework track body and hand movement? Yes. VNDetectHumanBodyPoseRequest returns up to 19 body joints per person, and VNDetectHumanHandPoseRequest returns 21 hand joints. Together, they power fitness form-checking, gesture controls, and sign-language applications, all on-device.
let request = VNDetectHumanBodyPoseRequest { request, error in

guard let observation =

request.results?.first as? VNHumanBodyPoseObservation else { return }

// Read a specific joint, e.g., the right wrist

if let wrist = try? observation.recognizedPoint(.rightWrist),

wrist.confidence > 0.3 {

print("Right wrist at \(wrist.location)")

}

}

let handler = VNImageRequestHandler(cgImage: cgImage)

try? handler.perform([request])
For hands, swap in VNDetectHumanHandPoseRequest and set maximumHandCount to limit how many hands to track. Feed the recognized joints into a Create ML action classifier to recognize specific gestures.
Building a Document Scanner with VisionKit
What’s the fastest way to build a document scanner in iOS? Use VisionKit instead of building the camera UI yourself. Its VNDocumentCameraViewController gives you edge detection, perspective correction, and multi-page capture out of the box – the same scanner used in Notes and Files.
Present the scanner, then read the scanned pages in the delegate. Run each page through the OCR request above to turn the scan into text.
import VisionKit

// Present the scanner

let scanner = VNDocumentCameraViewController()

scanner.delegate = self

present(scanner, animated: true)

// Delegate: receive the scanned pages

func documentCameraViewController(

_ controller: VNDocumentCameraViewController,

didFinishWith scan: VNDocumentCameraScan) {

for pageIndex in 0..<scan.pageCount {

let pageImage = scan.imageOfPage(at: pageIndex)

// Run a VNRecognizeTextRequest on pageImage for OCR

}

controller.dismiss(animated: true)

}
The distinction is worth remembering: Vision is the analysis engine, while VisionKit provides ready-made scanning UI on top of it. Use VisionKit for a fast, standard capture screen and Vision when you need full control over the pipeline.
Computer Vision Project Ideas Using the Vision Framework
What can you actually build with the Vision framework? Plenty. If you are looking for something concrete to start, here are project ideas that map directly to the requests above. Each one is a realistic first build for a US team, and each leans on a capability we have already covered.
- Receipt and document scanner app: Capture receipts with VisionKit, run OCR with VNRecognizeTextRequest, and use RecognizeDocumentsRequest to preserve tables and line items. Auto-categorize expenses for freelancers and small businesses – especially useful around US tax season.
- Retail barcode and price-checker: Use VNDetectBarcodesRequest to scan a product, then look up price and stock from your catalog. A practical tool for American retail associates on the floor and for shoppers comparing prices.
- Accessibility reader for low-vision users: Point the camera at a sign, menu, or letter and read the text aloud with on-device OCR and VoiceOver. Because processing stays on-device, it works offline and keeps personal documents private.
- Real-time gesture and sign-language app: Track hand joints with VNDetectHumanHandPoseRequest and classify gestures with a Create ML action classifier. A strong foundation for assistive and educational tools.
- Smart photo organizer: Combine VNClassifyImageRequest for auto-tagging with VNGenerateImageFeaturePrintRequest to group visually similar photos. Everything runs locally, so the library never leaves the device.
- AR object-tagging app: Detect objects with a Core ML model through VNCoreMLRequest and overlay live labels with ARKit and SwiftUI. Useful for field service, museums, and hands-on training.
- ID and form autofill: Scan a driver’s license, insurance card, or intake form, extract the fields, and pre-fill an app. FinTech onboarding and healthcare intake flows in the United States lean on this to cut drop-off during signup. On-device processing is what makes it viable for regulated data; the same reason privacy has to be designed in from the start on projects like our TeleHealth platform, not bolted on later.
Curious what one of these would take to build for your product? Start your discovery call, and we will scope it with you.
Real-World Applications
Beyond specific product ideas, the framework shows up across whole categories of apps. Matching the right request to the outcome is most of the battle:
| Product goal | Vision capability | Typical request |
|---|---|---|
| Scan a receipt or form | Structured text reading | RecognizeDocumentsRequest |
| Read a label or sign | Text recognition (OCR) | RecognizeTextRequest |
| Frame or filter faces | Face detection | DetectFaceLandmarksRequest |
| Retail checkout scanner | Barcode detection | DetectBarcodesRequest |
| Identify a product | Custom model inference | CoreMLRequest |
| Auto-organize a photo library | Image classification | ClassifyImageRequest |
Barcode and QR Code Scanning with VNDetectBarcodesRequest
How do you scan barcodes and QR codes in Swift? Use VNDetectBarcodesRequest, which returns VNBarcodeObservation results with the decoded payload and symbology. It is one of the simplest requests in the framework. Restrict the symbologies you care about to improve speed.
let request = VNDetectBarcodesRequest { request, error in

guard let results =

request.results as? [VNBarcodeObservation] else { return }

for barcode in results {

print(barcode.symbology, barcode.payloadStringValue ?? "")

}

}

request.symbologies = [.qr, .ean13] // optional: limit for speed

let handler = VNImageRequestHandler(cgImage: cgImage)

try? handler.perform([request])
Building a Vision-Powered App the Right Way
Prototyping a single Vision request is quick. Shipping a production feature that stays fast on older devices, handles low light and odd angles, respects privacy, and degrades gracefully when a model is unsure is a different kind of work. That gap is where most computer vision projects stall.
This is the kind of problem we take on every day. We work with US companies as a senior-only, architecture-first partner, which means we validate the hard questions before writing code: which device generations you must support, whether on-device inference is enough, or you need a custom Core ML model, and how the vision feature ties back to a real business outcome. No junior teams learning on your budget, and no black-box handoffs.
If you want to see how we approach this in practice, explore our iOS app development services or see how we’ve done it in our case studies.
Conclusion
The Vision framework gives Swift App Developers a genuinely powerful way to add computer vision to an app without a machine learning background or a cloud backend. From OCR to face detection to custom object detection, document scanning, and pose estimation, it turns hard problems into a few lines of Swift – and in 2026, the newer async API makes that code cleaner than ever.
As you build with it, you will keep finding new ways to make your app smarter, faster, and more useful – and more likely to stand out in a crowded App Store.
Ready to put computer vision to work in your iOS app? Let’s talk, and we’ll map it out together with Bitcot.
Frequently Asked Questions
Is the Vision framework free to use?
Yes. The Vision framework is part of Apple’s SDK and is free for any developer with an Apple Developer account. You only pay for the standard developer program membership, not for the framework or its on-device processing.
What iOS versions does the Vision framework support?
The framework has been available since iOS 11, so the classic VN-prefixed API runs on nearly every device in use today. The modern Swift-only API with async/await requires iOS 18 or later and is current in iOS 26, so you can branch on availability if you support older releases.
How does the Vision framework compare to Core ML?
They work together rather than compete. Core ML runs machine learning models on-device; Vision is a higher-level layer that handles image preprocessing and ships with ready-made requests for text, faces, barcodes, and more. When you need a custom model, you wrap it in Core ML and run it through Vision with VNCoreMLRequest, so most vision apps use both.
Does the Vision framework work on macOS?
Yes. Vision is available on macOS, iOS, iPadOS, tvOS, and visionOS. The same requests and observations work across platforms, though camera capture and UI differ, so most detection and recognition code ports with little change.
Does the Vision framework work offline?
Yes. Its core detection and recognition run entirely on-device using the Neural Engine, so they work without an internet connection and keep visual data on the phone. Only features you explicitly wire to a server would need connectivity.
Can the Vision framework detect text and objects at the same time?
Yes. You can perform multiple requests on the same image with one handler, and on iOS 18 and later, the performAll API streams each result as soon as it finishes, so a barcode can be handled before slower text recognition completes.
Should we build our vision feature in-house or hire a development partner?
If you have senior iOS and machine learning capacity to spare, and the feature is not on a hard deadline, in-house is reasonable. If the vision feature is core to the product and the timeline is real, a partner who has shipped it before removes the performance, privacy, and App Review risk that usually causes slippage. A simple rule: the more central the feature is to your product, the more that experience pays off.