Key Takeaways
- New personal developer accounts must complete 14-day closed testing before they can publish their app google play store for production.
- Closed testing requires a minimum of 12 active testers for 14 consecutive days.
- The 14-day clock starts only when testers opt in and install.
- Google Play reviews app files, privacy disclosures, permissions, and technical quality.
- Failure to meet closed testing requirements blocks production release approval.
Introduction
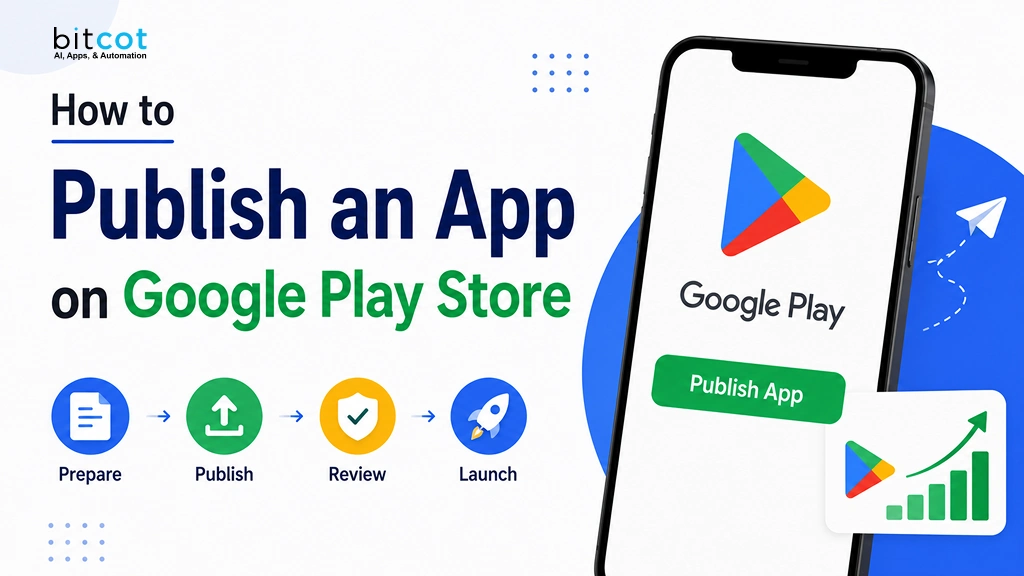
Publishing an Android app on the Google Play Store involves preparing your app, creating a developer account, uploading a release build, completing policy forms, and submitting it through the Play Console so Google can review and distribute it to users.
Publishing correctly matters because Google checks not only your app file, but also your privacy disclosures, store listing, permissions, account identity, and technical quality.
A Complete Step-by-Step Guide for Beginners
Edition · 2025–2026
CRITICAL FOCUS
Ensure compliance with Google Play’s 14-day closed testing requirement before production release.
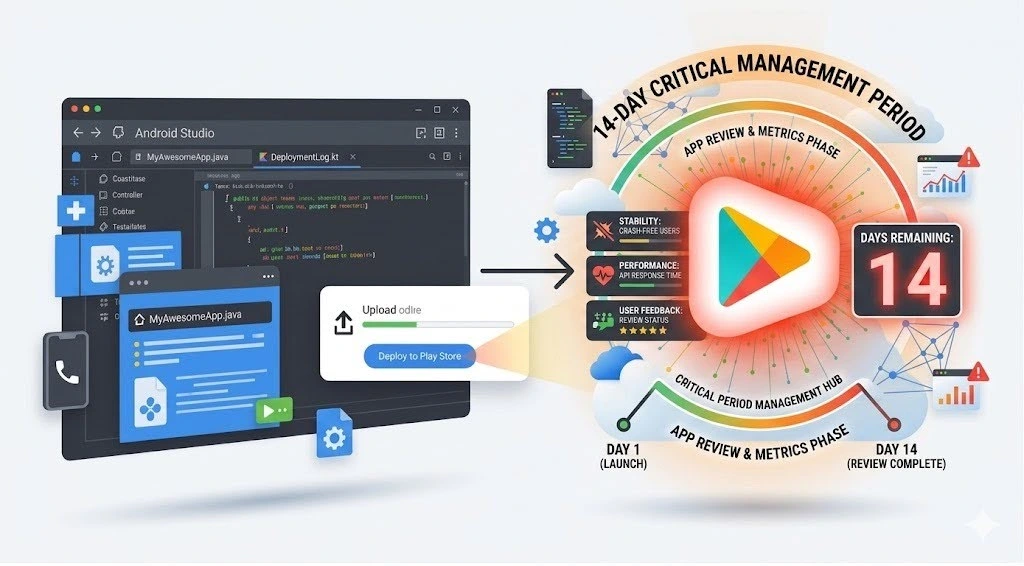
The single biggest delay for new personal developer accounts is the mandatory Closed Testing requirement introduced after November 2023. This step must be actively completed before you can apply for production access.
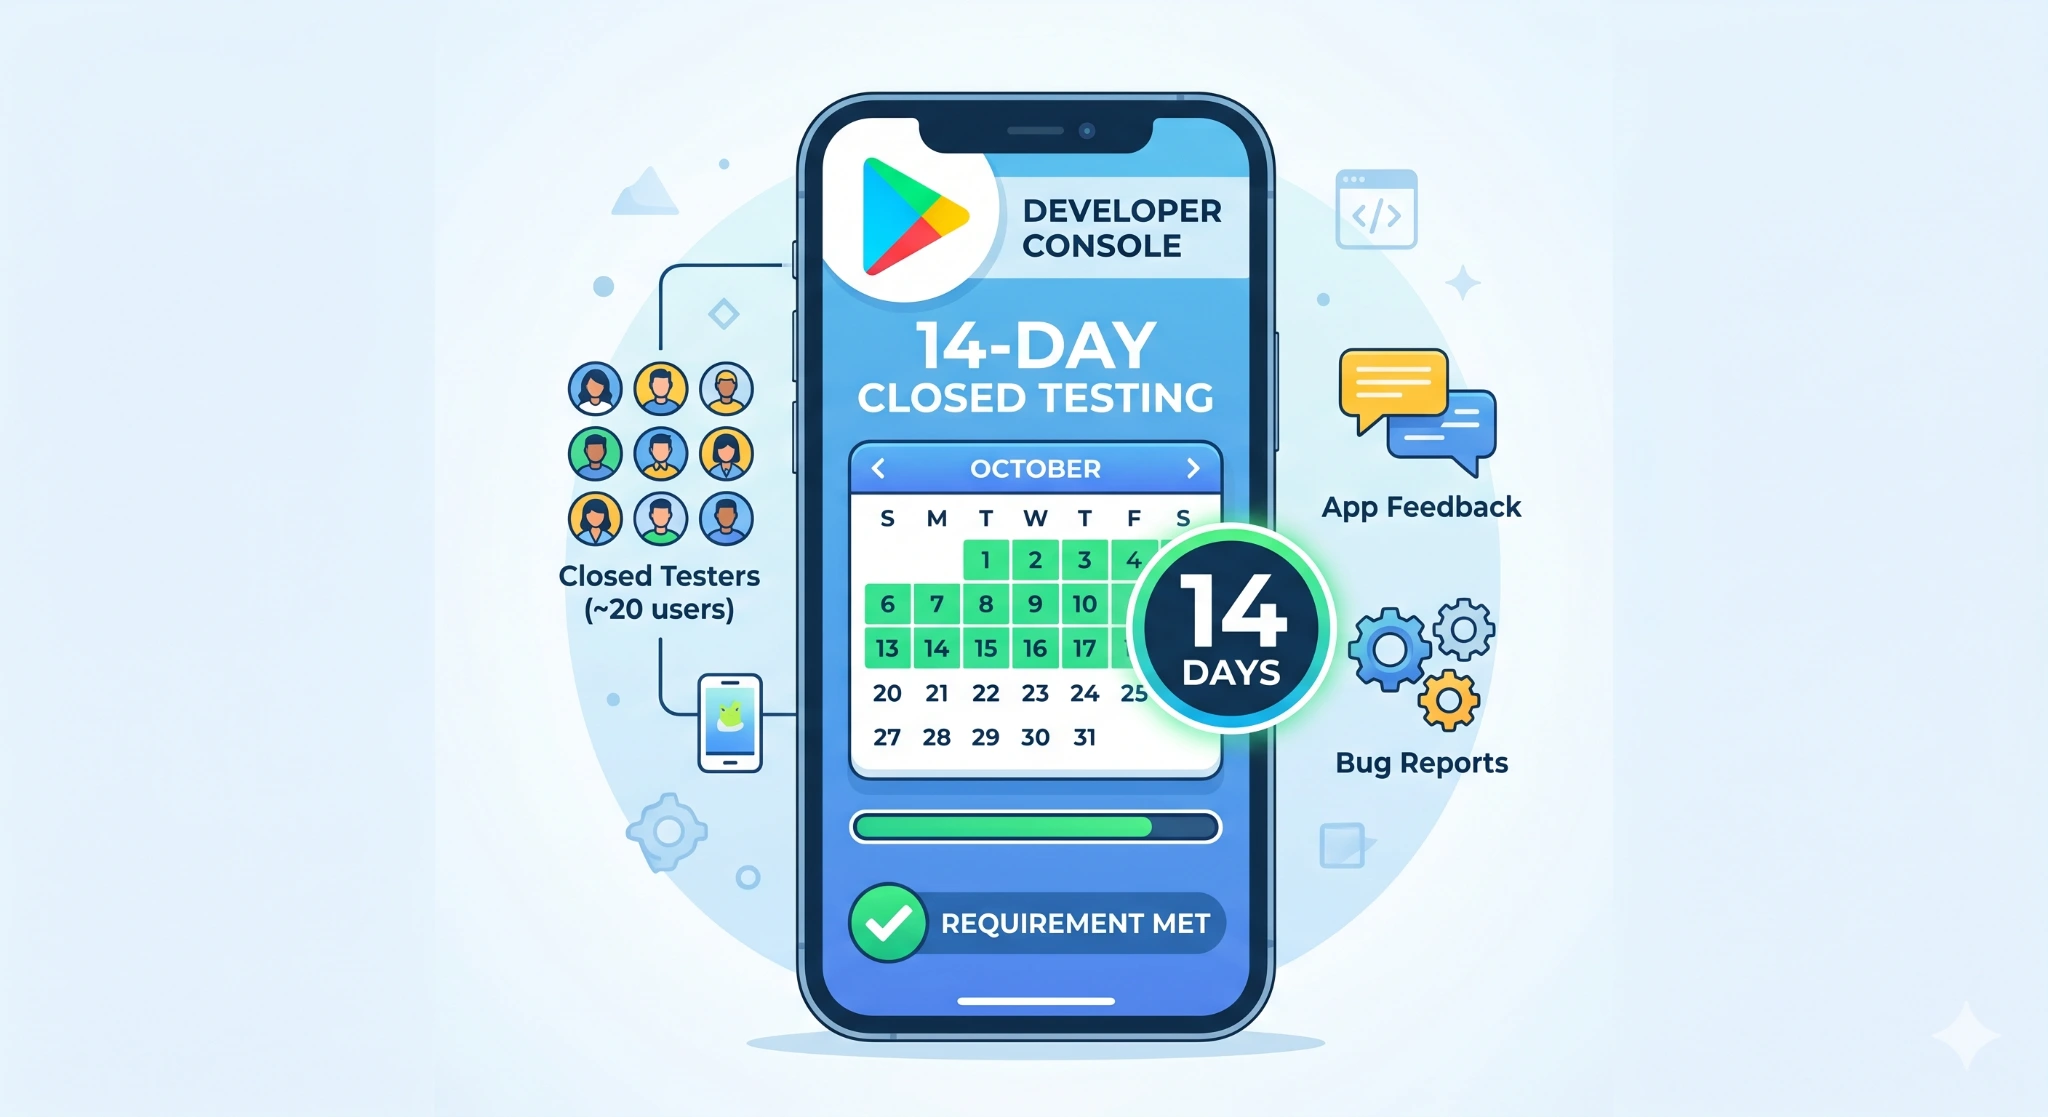
To activate the 14-day clock, you need a live release in your Closed Test track with at least 12 testers actively enrolled via the opt-in link; simply sending invitations doesn’t count. Track tester engagement daily: if even one tester becomes inactive before day 14, your counter resets, delaying production access by another two weeks.
Core Requirements of the 14-Day Closed Test
- Mandatory for New Accounts: Required for personal developer accounts created after November 13, 2023.
- Tester Count: You must have at least 12 eligible testers.
- Duration: Testers must opt in and remain active for 14 consecutive days.
- Importance: Failure to meet this is the #1 reason new n developers find their production release blocked. This test ensures your app is stable and meets basic user experience standards before general launch.
How the 14-Day Clock Starts
The 14-day requirement only begins when both conditions are met:
- Your Closed Test track has a live release available.
- You have at least 12 testers who have opted in to the test via the provided link.
Testers must be active for the full duration. Simply inviting 12 people is not enough; they must install the app and remain enrolled.
Track your 14-day countdown from the moment your first tester installs the app, not from when you send invitations. For example, if your closed test goes live on January 1st and your 12th tester installs by January 3rd, your 14-day clock runs from January 3rd to January 16th. Monitor tester engagement weekly; apps with inactive testers often face delays when Google reviews your production request.
Why This is Mandatory
This rule is designed to ensure developers are committed to basic app quality. Google reviews the test data (usage, crashes, ANRs) generated during this period. If your app shows significant stability issues or if the 14-day metric isn’t met, your request to release to production will be rejected, resulting in a mandatory waiting period.
Without at least 12 active testers enrolled for the full 14 days, your production release will be blocked; this accounts for over 60% of rejections among new n developer accounts. For example, a fintech app delayed its launch by 45 days because testers dropped out by day 10, forcing a restart of the entire clock.
The 5 Core Steps
- Create a Play developer account. Register at play.google.com/console with a one-time $25 fee and complete identity verification.
- Set up your app entry in Play Console. Create the app shell, choose app type (app or game), free or paid, and the default language.
- Upload a signed release build. Generate an Android App Bundle (.aab) from Android Studio, signed with your upload key.
- Complete content, safety, and policy declarations. Fill out Data safety, Ads, Content rating, Target audience, and any specific forms.
- Submit for review and release to production. After testing passes, push to the production track and wait for Google’s review.
Common Beginner Mistakes to Avoid
- Uploading APK instead of AAB. Modern Play publishing requires the Android App Bundle format.
- Losing the keystore file. Without your keystore, you cannot push updates. Back it up securely immediately.
- Skipping login credentials for reviewers. If your app requires a login, Google’s review team needs
working test credentials. - Using a temporary package name. Package names are permanent. Don’t publish with com.test.demoapp.
- Wrong target SDK version. New apps must target Android 15 (API 35) or higher. Too low = submission blocked.
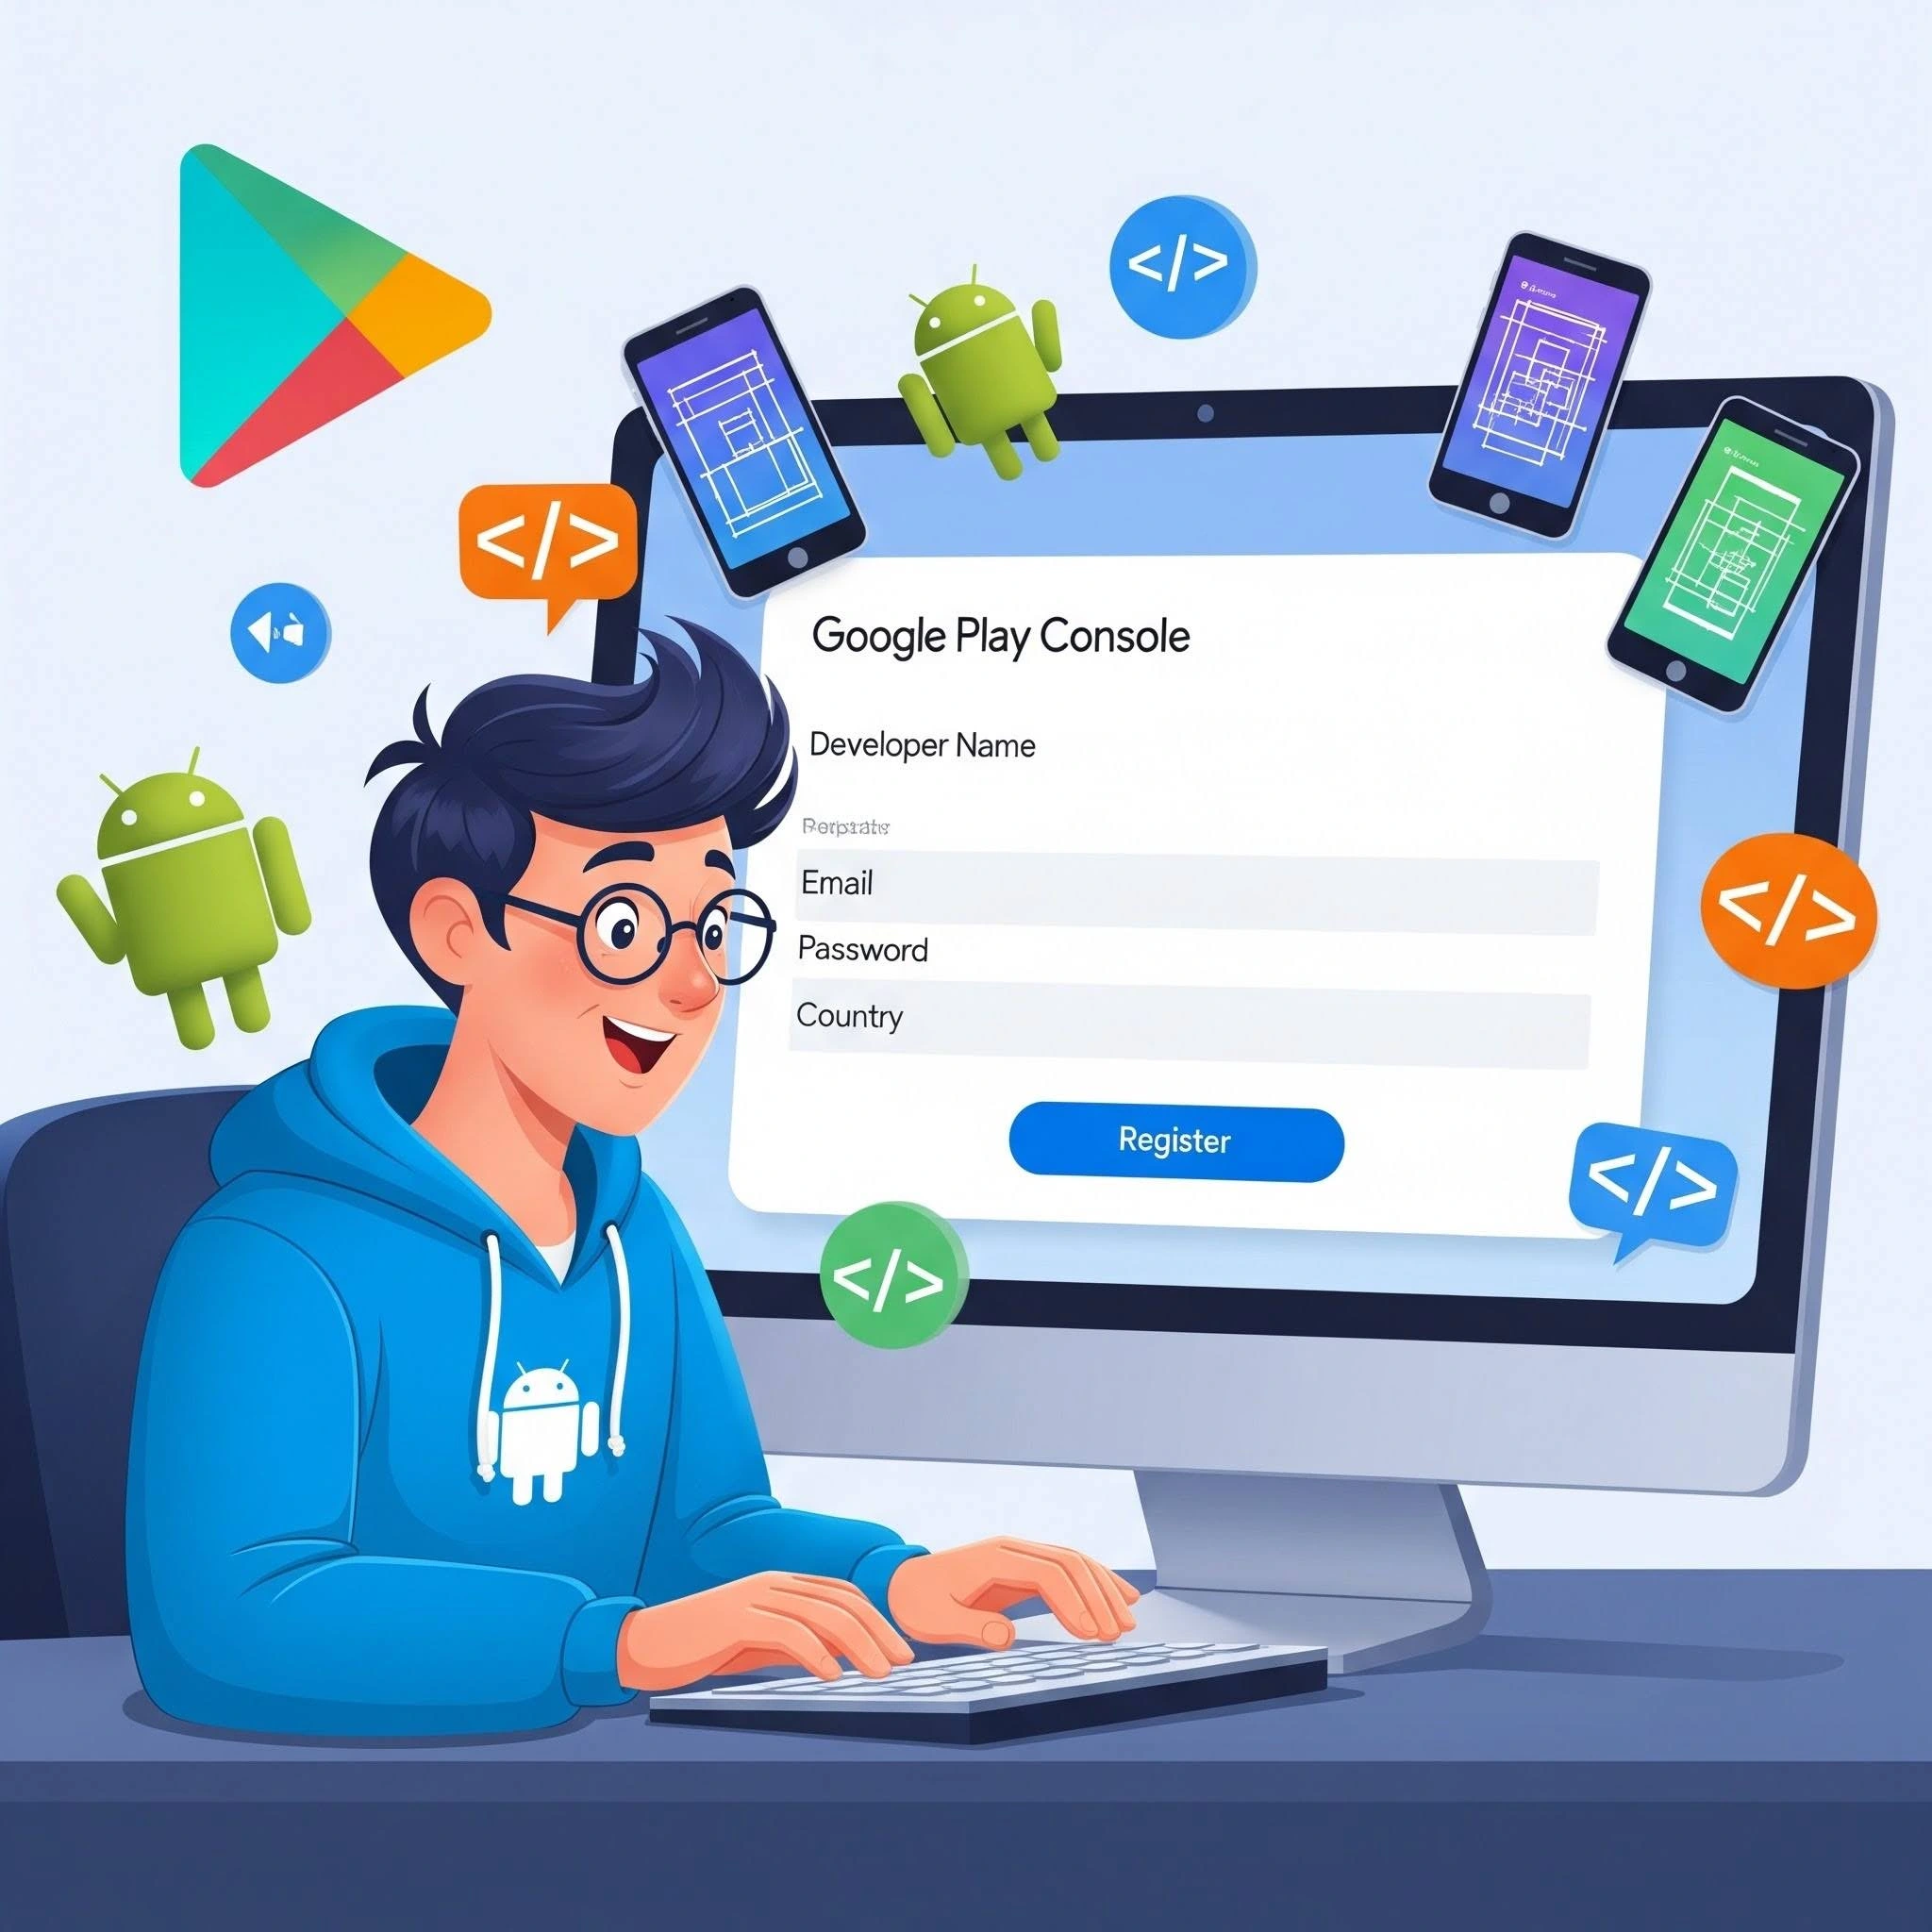
Creating a Google Play Console Account
To get started, you need a Google account, a verifiable legal identity, and the ability to pay the registration fee. Google offers two account types:
| Account Type | Best For | Requirements |
|---|---|---|
| Personal Account | Solo developers, freelancers, and indie makers | Government-issued ID and individual identity verification |
| Organization Account | Startups, companies, and brands | D-U-N-S number, company documentation, and representative identity verification |
Registration Fee
Google charges a one-time US$25 registration fee; supported cards: Visa, MasterCard, American Express. Prepaid cards are NOT accepted. This is not a yearly fee.
Identity Verification (Important for )
Google now requires account verification before you can submit apps:
- Personal accounts: government-issued ID may be required
- Organization accounts: D-U-N-S number, company documents, website, and representative identity
- Newer personal accounts may need Android device verification via the Play Console mobile app
Payments Profile for n Developers
Supports both developer registration and merchant registration. The default developer currency is USD. Use your legal name and n address exactly as they appear on official documents. The bank account must be in the same country as your payment profile.
| Billing Note |
|---|
| ⚠️ When setting pricing, keep local purchasing power in mind. $99/month often converts better than $ 499/month for indie apps. |
Preparing the App Before Upload
Before you generate your release build, get three things right: your package name, your signing setup, and your versioning.
Package Name Choose Permanently
Your package name is your app’s permanent technical identity. It cannot be deleted or reused later.
| Good Package Names | Avoid Package Names |
|---|---|
in.mybrand.expensetrackercom.acmestartup.invoiceapp |
com.example.demoappcom.test.myapp.final2com.temp.apptest |
Version Code and Version Name
Every release must have a higher versionCode than the previous one. The versionName is what users see (e.g, 1.0.0), while versionCode is the internal increasing integer (1, 2, 3…).
Why Most Developers Miss Google Play’s 14-Day Testing Requirement
Google’s 14-day closed testing mandate isn’t bureaucracy; it’s a hard reset for app quality standards. New developers often treat this requirement as a checkbox, but it’s actually your first real user feedback loop. The developers who succeed are those who view these 12 testers as genuine quality gatekeepers, not just a compliance hurdle. This forced pause catches critical bugs before they reach millions of users and protects your app’s reputation from day one.
The timing matters too. If you’re launching after November 2023, plan for this 14-day window upfront. Rushing to find testers at the last minute or hoping they’ll stay engaged without active communication will stall your release. Treat the closed test as a feature, not a delay; it’s your competitive advantage against poorly tested apps flooding the Play Store.
Target SDK Requirements
| Important Android Target SDK Requirement |
|---|
| 🚨 New apps and app updates must target Android 15 (API level 35) or higher. Existing apps must target at least Android 14 (API level 34) to remain available to new users. Submissions targeting lower SDK versions may be blocked. |
Privacy Policy
If your app collects user data, uses sensitive permissions, targets children, or has account-based features, you need a working privacy policy URL before submission. This includes data collected by third-party SDKs.
App Permissions Hygiene
Only request permissions that your app truly needs. Beginners often copy permissions from sample projects or SDKs without reviewing them. High-risk or sensitive permissions may trigger additional Google declarations.
Creating the Production Build

The release build you upload must be an Android App Bundle (.aab), not a plain APK.
| Format | What It Is | Google Play Store |
|---|---|---|
.apk |
Complete installable package for a specific device | Not recommended for new Play Store submissions |
.aab |
Android App Bundle used for publishing | Recommended (and generally required) Play Store format |
How to Generate a Release Build in Android Studio
- Build > Generate Signed Bundle / APK. Open from the top Build menu.
- Select Android App Bundle. Choose AAB (not APK) for Play Store submission.
- Choose or create your keystore. Store the .jks file safely. Losing it can mean losing the ability to update your app.
- Select the release build variant. Always select release, not debug.
- Test on a real device before uploading. Install the release APK on a physical device and test all flows.
| Play App Signing |
|---|
| 🔐 Recommended: Google manages your app signing key, while you use a separate upload key. If the upload key is compromised, it can be reset without changing the app signing key, making this approach safer for teams and beginners. |
Common Build Errors
- versionCode not incremented; Play Console will reject the upload.
- Debug build uploaded. Debug builds are signed with a debug key and won’t be accepted.
- A wrong or missing keystore can block you from pushing updates entirely.
- ProGuard/R8 crashes: Release builds with minification can crash if keep rules are missing.
Store Listing Setup
Your store listing is your app’s storefront what users see before downloading. A clean, honest, compelling listing improves installs and reduces rejection risk.
| Field | Character Limit | Tips |
|---|---|---|
| App Title | 30 characters | Keep it short, memorable, and brandable. Avoid keyword stuffing. |
| Short Description | 80 characters | Communicate one clear user benefit. |
| Full Description | 4,000 characters | Describe features, target audience, and unique value proposition. |
| Category | 1 required + optional secondary category | Select categories that accurately reflect the app’s purpose. |
| Tags | Up to 5 tags | Use only highly relevant tags. |
| Support Email | Required | Displayed publicly on the store listing. |
| Privacy Policy URL | Required | Must be publicly accessible and work on mobile devices. |
Sample Store Listing Finance App
- App title: MyBudget
- Short description: Track expenses, budgets, and savings goals easily
- Category: Finance
- Tags: Budgeting, Expense tracker, Personal finance
- Support email: [email protected]
- Privacy policy: https://mybudget.in/privacy
Required Image and Graphic Sizes
Google has strict requirements for all listing assets. Prepare these before starting the submission process.
| Asset | Size / Rule | Notes |
|---|---|---|
| App Icon | 512 × 512 px | PNG format |
| Feature Graphic | 1024 × 500 px | Should not be text-heavy |
| Phone Screenshots | 320 px – 3840 px | Minimum 2 required, maximum 8 |
| Tablet Screenshots | 1080 px – 7680 px | Required if the app supports tablets |
| Large-Screen Aspect Ratio | 16:9 landscape or 9:16 portrait | Recommended for large-screen devices |
| Android TV Banner | 1280 × 720 px | Required only for Android TV apps |
Good Screenshot Flow for an n Startup App
- Home screen with headline, e.g., ‘Track every rupee’
- Dashboard with insights, core data visualization, or summary
- Key feature: screen your most-used or most-unique screen
- Secondary feature: screen budgets, reports, and UPI integration
- Settings or onboarding: show simplicity; reassure the user
App Content and Policy Forms
Before review, open the App content section in Play Console and complete all relevant declarations. This is one of the most common reasons first-time developers get delayed.
| Form | What It Covers | Required? |
|---|---|---|
| Data Safety | Data collection practices, third-party SDKs, encryption, and user data deletion options | Always required |
| Ads Declaration | Whether the app contains advertisements | Always required |
| App Access | Login credentials and test accounts needed by reviewers | Required if the app requires authentication |
| Content Rating | Questionnaire used to determine age-appropriate content ratings | Always required |
| Target Audience | Intended age group and audience for the application | Always required |
| News Declaration | Compliance information for news and magazine apps | Required for news/media apps |
| Government Declaration | Government affiliation, representation, or official content disclosure | If applicable |
Testing Before Production Release
Google provides three testing tracks before production. Use them so that they exist to catch problems before they affect real users or your app’s rating.
| Track | Size | Best For |
|---|---|---|
| Internal Testing | Up to 100 testers | Basic QA, crash testing, and release validation |
| Closed Testing | Custom invite list | Structured beta programs, client pilots, and early adopters |
| Open Testing | Available to eligible Play users | Collecting broader user feedback before production release |
Common Rejection Reasons During Review
- App crashes or ANRs: Test on multiple real devices, including budget n Android phones.
- The reviewer cannot log in. Provide working demo credentials in the App access section.
- Data safety mismatch: Your answers must match what your app and SDKs actually collect.
- Misleading screenshots. Screenshots must show real app experience, not mockups.
- Wrong target SDK. Must meet current API level requirement (API 35).
- Missing privacy policy. Must be live, mobile-accessible, and accurate.
In-App Purchases and Subscriptions
If your app sells digital goods or services inside the app, Google requires you to use Google Play Billing. Physical goods like food delivery, taxis, or gym memberships are treated differently.
| Product Type | Use Case | Examples |
|---|---|---|
| One-Time Products | Single purchase with a permanent unlock | Premium features, virtual currency, ad-free upgrades |
| Subscriptions | Recurring access to ongoing value or services | Learning platforms, cloud backup, streaming services, Pro features |
Testing Purchases Safely
Use license testers and Play Billing Lab to test purchase flows without charging real money. Critical: if a test purchase is not acknowledged correctly, it is automatically refunded after about 3 minutes for license testers, so build proper acknowledgement logic.
| ⚠️ Free vs Paid Can’t Go Back: Google allows changing a paid app to free, but once an app has been offered for free, that same listing cannot later be converted into a paid app. Decide your monetization strategy before you first publish. |
Pricing Considerations
- Default developer currency is USD
- Keep pricing locally sensible, reflecting purchasing power
- Use Play Billing Lab to simulate country behavior during billing tests
- Consider offering monthly and yearly options with a clear price difference
Releasing the App
When you’re ready, you’ll create a production release in Play Console and submit it for Google’s review. A clean first submission matters more than a fast one.
Key Rules for Production Release
- Staged rollout (% of users) is for app updates, NOT for the first publication of a new app
- Do not keep editing the app while it’s under review. Edits may push you back in the queue
- Plan a buffer of at least one week between submission and your intended marketing launch date
- If rejected, read the notice carefully, fix the exact issue, and resubmit
- If you believe a rejection is incorrect, you can appeal through Play Console
| 📅 Launch Planning Tip: If you’re launching on a specific date, submit at least 10 days before to be safe. Google’s review queue is not predictable. ‘Expedited review’ is not a standard service available to all developers. |
Typical Approval Time
Review processing can take a few hours up to seven days, and longer in exceptional cases. For any planned marketing launch, keep a buffer of at least one week.
After Publishing
Publishing is the beginning, not the end. The Play Console tools for post-launch management are powerful; use them actively.
Crash Monitoring
Open Monitor and improve > Android vitals > Crashes and ANRs. User-perceived crash rate and ANR rate directly affect discoverability. Fix high-impact clusters first.
Ratings and Reviews
Read, filter, and reply to user reviews in Play Console. Fast, polite replies build trust, especially for new apps with low install volume.
Store Listing Experiments
Test different icons, screenshots, and descriptions to see which version drives better installs. This is one of the easiest post-launch growth tactics that most beginners ignore.
User Acquisition Tips for n Developers
- Optimize your first three screenshots, which show in search previews before a user taps your listing
- Use clear English or localized n-language listing text for your target audience
- Ask early users for honest reviews, never fake ones (Play policy violation, can get account banned)
- Fix crashes before spending money on ads. Bad ratings will hurt conversion
- Run listing experiments after you have real usage data, not before
Complete Pre-Submission Checklist
Use this checklist before pressing ‘Send for review’. Every item corresponds to a real reason apps get delayed or rejected.
Account & Identity
- Developer account created and registration fee paid
- Identity verification completed
- Contact email and phone verified
- Payment profile completed with the correct legal name and an address
- Payout method verified if monetization is enabled
App Setup
- Final package name confirmed (no test or demo names)
- Release build tested on a real physical device
- versionCode incremented, versionName updated
- App signed correctly (Play App Signing recommended)
- Target SDK meets the current requirement (API 35)
- Keystore backed up securely
Store Listing
- App title finalized (within 30 characters, no keyword stuffing)
- Short description written (80 characters)
- Full description written (up to 4,000 characters)
- Correct category selected
- Up to 5 relevant tags selected
- Support email added (required)
- Privacy policy URL added and working on mobile
Graphics
- App icon ready (512 x 512 px)
- Feature graphic ready (1024 x 500 px)
- Minimum 2 phone screenshots uploaded
- Tablet screenshots ready if app targets tablets
Policy and Forms
- Data safety form completed (including SDK data disclosure)
- Ads declaration completed
- App access instructions added (test credentials for reviewers)
- Content rating questionnaire completed
- The target audience declared
- News declaration completed if applicable
- Government declaration completed if applicable
Testing
- Internal test done and release build verified
- Closed test done with at least 12 testers
- 14-day testing rule satisfied (new personal accounts post-Nov 2023)
- Billing flows are tested with license testers if the app has purchases
- Login, OTP, and restricted access flows tested
Launch
- Countries selected correctly ( and others)
- Free vs paid status confirmed
- In-app products or subscriptions are active if needed
- Release notes written
- Submission timing planned with at least a 1-week review buffer
Conclusion
Publishing an app on the Google Play Store is absolutely manageable for beginners, freelancers, indie developers, and startups. The process is technical, but it follows a clear flow: create the account, verify identity, prepare the app properly, build an AAB, complete the listing, fill the policy forms, test well, and then release carefully.
The biggest success factor is not luck; it is discipline. Keep your account information accurate, follow Play policies, test before launch, and avoid rushed submissions. If you treat publishing as a structured launch process instead of a last-minute upload, your chances of approval and long-term success become much higher.
Frequently Asked Questions (FAQs)
How much does it cost to publish an app on the Google Play Store?
Google charges a one-time US$25 developer registration fee. This is not a yearly charge; you pay it once when you create your Play Console account.
Should I choose a Personal or Organization account?
Choose Personal if you’re publishing as an individual freelancer or solo developer. Choose Organization if you’re a startup, company, or brand that wants business ownership aligned with company documents.
Is APK upload enough, or do I need an AAB?
For modern Play publishing, you must use Android App Bundle (AAB). Google Play uses it to generate device-specific optimized APKs, which means smaller downloads for users.
How long does Google Play app review take?
Review processing can take a few hours up to seven days, and longer in exceptional cases. For any planned marketing launch, keep a buffer of at least one week between submission and launch date.
Why was my app rejected even though it works on my phone?
A working app can still be rejected for: missing reviewer login credentials, incorrect Data safety answers, missing privacy policy, target SDK below required level, incomplete declarations, or misleading store listing assets.
Can I change my app from free to paid later?
No. Google allows changing a paid app to free, but once an app has been offered for free, that same listing cannot later be converted into a paid app. Decide your monetization approach before your first publish.